Quantcast
Channel: clock – Hackaday
Viewing all 493 articles
Browse latest View live

Word Clock Don’t Need No Stencil Font

$
0
0

Word clocks use natural language to display the time. They’ve been in vogue in the last 20 years or so, as low-cost digital technology makes them particularly cost effective and easy to build for the average maker. The hardware and software is a solved problem, so presentation is everything. Luckily, [watsaig]’s effort does not disappoint.

The build began with a timeframe of just seven days — a narrow window given [watsaig]’s lack of experience with lasercutting and woodworking. Not content to let that get in the way, it was time to get to work. Wood was sourced from Amazon and designs laid out, before lasercutting began in earnest.

[watsaig] decided to fill all of the letters with epoxy to achieve a flat finished surface that also served as diffuser for the LEDs. To avoid using an unsightly stencil font, the centers (the cut out portion) of letters like O, A, and R had to be placed by hand. Unfortunately his turned out quite badly. When using a squeegee method to work epoxy into the letters, the inserts tended to shift, ruining the face plate.

Undeterred, the clock face was recreated from scratch, and it was determined that a pipette was a far more suitable tool, allowing the letters to be filled with epoxy without unduly disturbing the letter inserts. The final result is visually attractive, finished with a wonderful stain and giving a pleasing glow thanks the careful attention to diffusion and masking. The hidden Happy Birthday message may have been lost in the rush, but it’s the thought that counts, after all.

For a Continental take, check out this word clock in Catalan.


Wooden Clock To FPGA Conversion

$
0
0

[John] wanted a project to help him learn more about FPGAs. So he started with his wooden clock — made with an Arduino — and ported it over to a Lattice FPGA using Icestorm. What’s nice is that he takes you through the steps he used to simulate the design using the Falsted simulator and then realizing it in the FPGA. Since he’s just starting out, it is a good bet he ran into the same rough edges you will (or did) and sometimes that can really help get you over the hump. You can see a video below, and the code for the project is on GitHub.

For example, after mocking up a circuit design in Falstad he realized he could make one large counter instead of several modules, and he contrasts that to a more modular approach. He also ran into a feature that was simple for the Arduino but difficult for the FPGA. He got it working, but it took some optimization effort to make everything fit in the relatively small FPGA he was using.

The original motivation for [John] was seeing how [Mattvenn] created a custom peripheral for the RISC-V CPU. In that case, you have a whole CPU at your disposal, but we agree that it was wise not to start with that as a first project.

We also liked the approach of thinking about the logic first and then moving on to the Verilog. Granted, if you have a lot of experience it is customary to skip that step and just visualize your desired logic in Verilog, but that comes with experience.

We’ve written a lot about the Icestorm project in the past, including our own getting started tutorials. But sometimes having a choice of examples and starter projects can make things easier.

UV Glow Clock Tells The Time Glowingly

$
0
0

Reddit user [TuckerPi] wanted to make something to thank his father for helping him get through his engineering degrees. He hit it out of the park with this awesome glowing clock. The clock uses a strip of UV glow tape, which is rotated by a small stepper motor. On one side a UV LED is moved up and down by a second motor to make the tape glow underneath it. A Raspberry Pi drives the whole system, writing the time on the tape and rotating it to face outwards. Once a minute the clock rewrites the time on the rubber.

This is a lovely build that shows what [TuckerPI] learned in college, as he built most of the mechanism himself, cutting his own metal gears and parts and making a nice, simple case from African mahogany. He also shows his mistakes, such as his first attempt to build the glowing mechanism from silicon rubber mixed with UV powder. Although it worked initially, he found that the UV powder fell out of the rubber after a short while, so he replaced it with UV glow tape.

[TuckerPi] hasn’t published the full schematics of the device, but there is a lot of detail in the Imgur photos of the build and in the Reddit thread where he discussed the build. Kudos to him for finding an interesting and unique way to thank his father for his help.

imgur-ktfdmet

Arduino Tachometer Clock Fires on All Cylinders

$
0
0

We’re certainly no strangers to unique timepieces around these parts. For whatever reason, hackers are obsessed with finding new and interesting ways of displaying the time. Not that we’re complaining, of course. We’re just as excited to see the things as they are to build them. With the assumption that you’re just as enamored with these oddball chronometers as we are, we present to you this fantastic digital tachometer clock created by [mrbigbusiness].

The multi-function digital gauge itself is an aftermarket unit which [mrbigbusiness] says you can get online for as little as $20 from some sites. All he needed to do was figure out how to get his Arduino to talk to it, and come up with some interesting way to hold it at an appropriate viewing angle. The mass of wires coming out of the back of the gauge might look intimidating, but thanks to his well documented code it shouldn’t be too hard to follow in his footsteps if you were so inclined.

Hours are represented by the analog portion of the gauge, and the minutes shown digitally were the speed would normally be displayed. This allows for a very cool blending of the classic look of an analog clock with the accuracy of digital. He’s even got it set up so the fuel indicator will fill up as the current minute progresses. The code also explains how to use things like the gear and high beam indicators, so there’s a lot of room for customization and interesting data visualizations. For instance, it would be easy to scrap the whole clock idea and use this gauge as a system monitor with some modifications to the code [mrbigbusiness] has provided.

The gauge is mounted to a small project box with some 3D printed brackets and bits of metal rod, complete with a small section of flexible loom to cover up all the wires. Overall it looks very slick and futuristic without abandoning its obvious automotive roots. Inside the base [mrbigbusiness] has an Arduino Nano, a DS1307 RTC connected via I2C, a voltage regulator, and a push button to set the time. It’s a perfectly reasonable layout, though we wonder if it couldn’t be simplified by using an ESP8266 and pulling the time down with NTP.

We’ve seen gauges turned into a timepiece before, but we have to admit that this is probably the most practical realization we’ve seen of the idea yet. Of course if you want to outfit the garage with something a bit more authentic, you can always repurpose a Porsche brake rotor.

Follow The Bouncing Needles Of This Analog Meter Clock

$
0
0

Our community never seems to tire of clock builds. There are seemingly infinite ways to mark the passage of time, and finding unique ways to display it is endlessly fascinating.

There’s something about this analog voltmeter clock that really seems to have caught on with the Redditors who commented on the r/DIY thread where we first spotted this. [ElegantAlchemist]’s design is very simple – just a trio of moving coil meters with nice industrial-looking bezels. The meters were wired for 300 volts AC, so the rectifier and smoothing cap were removed and the series resistance was substituted for one more appropriate for the 0-5VDC range needed for the project. New dial faces showing hours, minutes and seconds were whipped up in Corel Draw, and everything was put into a sturdy and colorful aluminum “stomp box” normally used for effects pedals. An Arduino Nano and an RTC drive the meters with a nice, bouncy action. Simple, cheap to build, and a real crowd pleaser.

The observant reader will note a similarity to a clock we covered a while back. That one chose 3D-printed cases for an airplane instrument cluster look. We like the spare case design in [ElegantAlchemist]’s build, but wonder how this clock would look in a fine wood case.

This Creepy Skull Shows Time With Its Eyes

$
0
0

Sometimes you have an idea, and despite it not being the “right” time of year you put a creepy skull whose eyes tell the time and whose jaw clacks on the hour into a nice wooden box for your wife as a Christmas present. At least, if you’re reddit user [flyingalbatross1], you do!

The eyes are rotated using 360 degree servos, which makes rotating the eyes based on the time pretty easy. The servos are connected to rods that are epoxied to the spheres used as eyes. Some water slide iris decals are put on the eyes offset from center in order to point in the direction of the minutes/hours. An arduino with a real time clock module keeps track of the time and powers the servos.

Check out the video after the break:

The jaw opens and closes on the hours – springs are screwed to the inside of the jaw to the outside of the skull behind the bones that surround the eyes; they’re hidden when the skull is in its box. A third servo is used as a winch to pull the jaw open from the inside of the bottom of the chin. When it releases, the springs close the mouth and the clack of the teeth replaces an hourly chime.

A bit late (or early) for Halloween, but it’s a really fun project. [Flyingalbatross1] has made the arduino code available, as well as showing plenty of images of how the parts are put together. Take a look at this this atomic clock-in-a-skull, or you make your own talking skull for Halloween!

via Reddit

Every Digital Clock Is Made Of Analog Components

$
0
0

In 2008, an art studio out of Stockholm released the ClockClock, a digital clock with an analog heart. The ClockClock used 24 individual analog clocks — hour and minute hands and all — to display time digitally. The world went crazy, Pinterest blew up, and everyone wanted a digital analog clock until the next interesting project distracted the masses.

This was ten years ago, and for a project that’s neck deep in stepper motors, timekeeping, and 3D printed parts, we haven’t seen a DIY project that puts these tools together to build a clone of the ClockClock. Until now, that is. [Wojtek] was inspired by the ClockClock and decided to make his own.

For the plastic bits, each of the 24 analog clocks are printed out of PLA. So far, it’s exactly what we would expect. The trick to the ClockClock is moving the hour and minute hand of each analog clock independently. This is done with a double shaft — just like a real clock — and two stepper motors. Each of the stepper motors are controlled by a single PCB in each analog clock with two 360° stepper drivers, a dual motor driver, and an ATMega328pb microcontroller. As a group, the individual analog clocks are controlled over I2C, with a single ‘satellite’ board serving as the master.

While there are a few details missing from this build, specifically how to attach the hands to the stepper motors, this is an amazing project. Someone finally built a ClockClock, and it didn’t cost thousands of dollars as the original did. You can check out some videos of the Analog/Digital clock below.

Is That A Word Clock In Your Pocket?

$
0
0

Word clocks are one of those projects that everyone seems to love. Even if you aren’t into the tech behind how they work, they have a certain appealing aesthetic. Plus you can read the time without worrying about those pesky numbers, to say nothing of those weird little hands that spin around in a circle. This is the 21st century, who has time for that?

Now, thanks to [Gordon Williams], these decidedly modern timepieces just got a lot more accessible. His word clock is not only small enough to fit in the palm of your hand, but it’s the easiest-to-build one we’ve ever seen. If you were ever curious about these gadgets but didn’t want to put in the the time and effort required to build a full scale version, this diminutive take on the idea might be just what Father Time ordered.

The trick is to attach the microcontroller directly to the backside of an 8 x 8 LED matrix. As demonstrated by [Gordon], the Bluetooth-enabled Espruino MDBT42Q fits neatly between the rows of pins, which need only a gentlest of persuasions to get lined up and soldered into place. Since the time can be set remotely over Bluetooth, there’s not even so much as an additional button required. While driving the LEDs directly off of the digital pins of a microcontroller is never recommended, the specifics of this application (only a few of the LEDs on at a time, and not for very long) means he can get away with it.

Of course, that just gets you an array of square LEDs you blink. It wouldn’t be much of a word clock without, you know, words. To that end, [Gordon] has provided an overlay which you can print on a standard inkjet printer. While it’s not a perfect effect as the light still comes through the ink, it works well enough to get the point across. One could even argue that the white letters on the gray background helps with visibility compared to just the letters alone lighting up.

If you’re not in the market for a dollhouse-sized word clock, fear not. We’ve got no shortage of adult sized versions of these popular timepieces for your viewing pleasure.


3D Printed Alarm Clock Looks Just Like Store Bought

$
0
0

Clocks are a popular project on Hackaday. They’re a great way to showcase a whole range of creative build techniques, and can make an excellent showpiece as well. We’ve seen everything from the blinkiest binary build to the noisiest alarms, but [Benoit] has delivered something different — a stylish build that looks like it came right off the store shelf.

The clock features a large 7-segment display built with IN-PI554FCH LEDs, which are similiar to the popular WS2812Bs but with lower power consumption. There’s also an OLED display for reading the date and going through menus, capacitive touch buttons for control and an Arduino Mega to tie everything together.

The real party piece is the enclosure, however. [Benoit] spent significant time honing a process to get a nice surface finish on Shapeways SLS parts. The 3D printed components are first cleaned with a toothbrush to free any loose powder, before several stages of primer, sanding, and paint. The final product is then finished with decals that lend the device that perfect factory look. If you’re eager to replicate the build, the parts are available at Github.

[Benoit]’s clock is a great example of what can be achieved by the home builder who is willing to wait a couple weeks for high quality 3D printed parts and decals to ship. It’s not [Benoit]’s first build to grace these hallowed pages, either – his transparent clock runs Linux!

Ten 3D Printed Gadgets That Just Can’t Stay Still

$
0
0

There was a time, not so very long ago, when simply getting a 3D printer to squirt out an object that was roughly the intended shape and size of what the user saw on their computer screen was an accomplishment. But like every other technology, the state of the art has moved forward. Today the printers are better, and the software to drive them is more capable and intuitive. It was this evolution of desktop 3D printing that inspired the recently concluded 3D Printed Gears, Pulleys, and Cams contest. We wanted to see what hackers and makers can pull off with today’s 3D printing tools, and the community rose to the challenge.

Let’s take a look at the top ten spinning, walking, flapping, and cranking 3D printed designs that shook us up:

Mechanical Take on a Classic Part

The seven segment LED display has been part of the hacker’s arsenal since we first started banging electrons together, but Peter Lehnér’s mechanical recreation of this quintessential circuit component shows that even the classics can benefit from a fresh perspective now and again. These giant digits might retain the look of their electronic counterparts, but that’s where the similarities end. Behind the scenes, there’s nothing but 3D printed cogs and wheels actuating the individual segments. They aren’t just some novelty either, as Peter makes a compelling case for how these large high visibility displays could be put to practical use in scoreboards or other outside displays where real LEDs might not be ideal.

An impressive mechanical design that not only looks gorgeous but may even have a practical application, this entry was an early favorite for all the judges and was an easy pick for our first $275 cash prize.

The Mad Scientist’s Music Box

If you had to associate a sound with 3D printed mechanical gadgets, it would likely be the whir of a stepper motor or the hollow clacking of plastic pieces hitting each other. But the incredible Automata Music Sequencer created by Dean Segovis proves that even PLA has a song in its heart. Inspired by the design of the classic music box, his creation uses printed drums with movable lugs to trigger banks of micro switches; giving you the makings of a basic sequencer. When paired with that most classic of ICs, the 555 timer, electronic music is born.

Not only did Dean create a printed contraption that ticks all the boxes for our contest, but we were impressed with his documentation which gives the reader insight into his creative process for this project. This project beeped and blooped its way into the number two spot, and another $275 cash prize.

Time Flies With this Printed Clock

If you had a mental sound in mind for moving 3D printed creations, you certainly had a look in mind as well. If you expected all the entries to be rough-hewn and rainbow colored, Steve’s 3D Printed Pendulum Clock is here to show you that even plastic can be gorgeous if you know how to work with it. His mechanical pendulum clock isn’t just a pretty face either, it can run for up to eight days on a single winding while maintaining an accuracy within two minutes. But frankly, even if this beauty only kept time for a single day, we’d still be happy to have it on our wall.

The culmination of six months of work, this printed timepiece is a true work of mechanical art and more than deserving of the $275 cash prize.
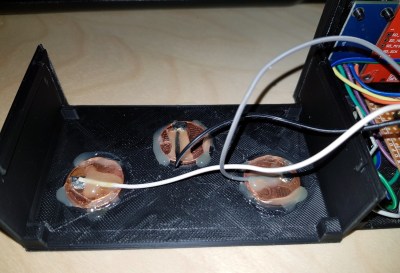
Runners Up:

Truth be told, this was a difficult contest to judge as we were absolutely floored with the creativity shown in so many of the entries. Some of these creations really exceeded our expectations with this contest, and served as a fascinating look into what’s possible with the technology. While they couldn’t all take the top spots, we think any one of these runners-up prove that the 3D printing revolution is alive and well:

Even narrowing it down to these seven entries was quite a challenge. Check out the complete list of contest entries if you’re looking to get inspired for your next 3D printed project.

Honorable Mentions

We want to feature three notable entries that didn’t make it into the prize pool above, but are all well worth celebrating. Vertical landing and takeoff for fixed-wing aircraft means rotating the thrust and that’s exactly what this tilt rotor project accomplishes. The 3D printed syringe actuator is demonstrated by injecting liquid into an acoustic levitator; a great trick to remember when getting into scientific experimentation. And finally, the crossed helical gears design tool is a great way to leverage OpenSCAD to print gears for your projects when the axes are not on the same plane.

We had a blast looking in on these gear projects and that excitement doesn’t end with this contest. Keep those hacks coming!

RetroPie NES Clock Tells You When it’s Game Time

$
0
0

We’ve all seen the 3D printed replicas of classic game consoles which house a Raspberry Pi; in fact, there’s a pretty good chance some of the people reading this post have one of their own. They’re a great way to add some classic gaming emulation to your entertainment center, especially compared to the bare PCB chic of just having a Pi hanging off your TV’s HDMI port.

[Victor Heid] loved the look of these miniature consoles, but wanted to challenge himself to design something that was also multi-functional and unique. So he decided to create an NES-inspired case for the Raspberry Pi 3 A+ that doubles as a LED matrix clock with a decidedly retro feel. Frankly, even if it was just a clock we would have been impressed with the final product; but the fact that it’s also a fully functional RetroPie build really goes above and beyond.

It should be obvious just looking at the completed product that [Victor] put a lot of effort into sanding and finishing the 3D printed case. But we don’t have to imagine the process, since he was kind enough to thoroughly detail the steps and materials he used. As you might have guessed, the short version is a lot of filler and a lot of time; but it’s worth looking at the complete write-up if you’ve ever considered trying to make your own printed parts look less…printed. His method of applying the lettering on the front of case using a laser printer, some Mod Podge, and a healthy dose of patience is also something you might want to file away for a future project.

The electronics for this project are exceptionally simple, as [Victor] used the Pimoroni Scroll pHAT HD rather than trying to roll his own LED matrix in such a limited space. So it was just a matter of connecting up the wires to the Pi’s GPIO header and getting the various bits of software talking to each other, which he also details for anyone who might be interested.

It’s been a few months since the Raspberry Pi 3 A+ was unveiled, and we’re finally starting to see projects that make use of the new board’s reduced footprint. The ability of hardware like the A+, combined with the lackluster attempts by manufactures to produce official “mini” systems, seems to have set the stage for hackers to once again outshine commercial offerings. Not that we’re complaining, of course.

An ESP8266 Sundial For Your Wall

$
0
0

Hackers absolutely love building clocks. Seriously, there are few other devices for which we’ve seen such an incredible number of variations. But while the clocks that hackers build might blink out the time in binary, or write it out in words, they generally don’t feature hands. Apparently in 2019 it’s more reasonable to read binary than know which way the “little hand” is supposed to be pointing.

This ESP8266 powered “shadow clock” from [Dheera Venkatraman] technically keeps that tradition intact, but only just. His clock doesn’t feature physical hands, but it does use a strip of RGB LEDs to cast multi-colored shadows which serve the same function. With his clock, you don’t even have to try and figure out which hand is the big one, since they’re all the same length. Now that’s what we call progress.

Probably the biggest surprise about this clock, beyond how legitimately good it looks hanging on the wall, is how little work it takes to build your own version. That’s because [Dheera] specifically set out to design something that was cheaper and easier to build than what he’d seen previously, and we think he delivered on that goal in a big way. All you need are the 3D printed components, an ESP8266 board, and a strip of 144 WS2812B LEDs.

The software side of the project is similarly simplistic, and all you need to do is plug in your WiFi network credentials to have the ESP pull the current time from NTP. If you were so inclined, his source code would be an excellent base on which to implement additional features such as animations at the top of the hour.

Compared to something like the Bulbdial clock from 2009, it’s incredible how simple some of these projects have become in the last decade. With the tools and components available to hackers and makers today, there’s truly never been a better time to build something amazing.

A Scratch Built VFD Clock with Inner Beauty

$
0
0

Vacuum fluorescent displays (VFDs) are one of those beautiful pieces of bygone technology that you just don’t see much of anymore. At one time they were a mainstay of consumer electronics, but today they’ve largely been replaced with cheaper and more energy efficient displays such as LEDs and LCDs. While they might be objectively better displays, we can’t help but feel a pang of regret seeing a modern kitchen bereft of that unmistakable pale green glow.

If his impressive VFD clock is any indication [Simón Berraud] feels the same way. Not only does the clock’s display instantly trigger waves of nostalgia, but the custom PCB has that mistakable look of consumer electronics circa 1985. If we didn’t know better, we’d think this thing fell through a time warp.

Well, if it wasn’t for the SMD ATmega328 on the flip side of the board, anyway. In addition to the MCU, the clock features four ULN2003AN Darlington transistor arrays to drive the VFD, and a M48T08 Real Time Clock to keep the whole thing ticking.

The careful observer might notice a distinct lack of buttons or switches on the clock, and wonder how this retro wonder is set. In a particularly radical hack, [Simón] sets the time with a hard coded variable in the source code; you just need to set it far enough into the future so that you have enough time to power it up at the appropriate moment.

[Simón] has put the Arduino-flavored source code for the ATmega328 as well as the schematics and board files in his GitHub repository for anyone else who might want to take a walk down memory lane. While you’re at it, you may want to look at these tips for getting unknown VFDs up and running, as well as this interesting explanation of how they can be used as amplifiers if you’re really looking for style points.

ESP32 Alarm Clock Doesn’t Skimp On The Features

$
0
0

The ESP family of microcontrollers is absolutely on fire right now, with a decent chunk of the projects that come our way now based on one of the impossibly cheap WiFi-enabled boards. In fact, they are so cheap and popular that we’ve started to see a somewhat unexpected trend; people have a tendency to use them as drop-in replacements, despite the more modern boards being considerably more powerful than required. The end result is a bunch of projects in which the ESP is simply underutilized. It’s not a big deal, but somewhat disappointing to see.

But we can assure you this ESP32 alarm clock created by [Pangodream] is absolutely not one of them. He’s packed an impressive number of features into this unassuming little timepiece, and it’s really an excellent example of how much these boards are capable of without breaking a sweat. From DIY touch sensors to the Android application used to configure the clock over the network, this project is overflowing with neat hardware and software tricks worth taking a closer look at.

Inside the 3D printed case, the clock features a BH150 light sensor, the very popular DHT-11 for detecting temperature and humidity, as well as a ILI9341 2.8 inch LCD for the display. In a particularly clever touch (get it?), [Pangodream] used three coins connected to the digital pins of the ESP32 as capacitive sensors. These allow him to interact with the click just by tapping the top of the case, and saved him the trouble of adding traditional switches or buttons. We might have put some indentations in the top case to make identifying which of the three “buttons” you’re pushing, but we suppose the invisible interface does make things look a little more futuristic.

But if even that is too much physical touching for you, then [Pangodream] has come up with a fairly robust system for controlling and interacting with the clock over the network. It’s not just a convenient way of setting the time, a good number of the clock’s functions can be polled and configured in this manner; everything from the sensitivity of the touch sensors to how many times it will beep when the alarm goes off. To make things easier, he’s even wrapped it all up in a handy Android application for on the go configuration.

If this clock doesn’t offer you the level of over-engineering you require, check out this build that uses no less than five ESP32s to get the job done. Or maybe this one that hooks into NASA’s Deep Space Network.

Robot Arms Nudge the Hands of Time in the Strangest Clock

$
0
0

We see a lot of clocks here at Hackaday. Digital clocks, retro clocks, lots of Nixie clocks, binary clocks, and clocks that appear to be designed specifically to be unreadable. But this dual-servo kinematic clock is something we haven’t seen yet, and it’s certainly worth a mention.

[mircemk]’s idea is simple and hearkens back to grammar school days when [Teacher] put a large cardboard clock dial on the blackboard and went through the “big hand, little hand” drill. In this case, the static cardboard clock has been replaced by a 3D-printed dial and hands, while a pair of servos linked together by two arms takes the place of the teacher. The video below shows it in action; the joint in the linkage between the two servos has a screw sticking out that can be maneuvered across the clock face to reposition the hands. It’s a little jittery, though; [mircemk] might want to tune the servo loops up a bit or tighten the linkage joints to make things a little smoother.

Even with the shakes, we find it wonderfully weird and hard to stop watching. It reminds us a bit of this luminous plotting clock from a while back – same linkage, different display.


What’s More Accurate than a GPS Clock? The OpenPPS GPS Clock

$
0
0

Making a GPS clock is a relatively straightforward process on the face of it. Buy a GPS module for a few dollars, hook it up to a microcontroller board of your choice, pick the appropriate library and write a bit of code, et voila! A clock with time-wonk bragging rights!

Of course, your GPS clock will always tell the right time, but it won’t be really right. Your microcontroller will introduce all sorts of timing errors and jitter, so at best it’ll only be nearly right. [Rick MacDonald] has been striving to quantify and minimise these errors in his OpenPPS project, which aims to be as accurate a GPS time and frequency reference as possible.

In a very comprehensive multi-page write-up, he details his progression, through the GPS modules he used, his experience with timing jitter when he used an ESP32 alone to process their output, and then his experiments with an FPGA and then temperature-compensated oscillators. It moves from being a mere description of a GPS clock into a fascinating run-down of both GPS timing itself and the development pitfalls he encountered along the way. At the end of it all he has a GPS clock in a smart 3D-printed enclosure which he admits as yet doesn’t do anything more than tell the time, but as he points out it’s a clock with minimised jitter, delay, and drift, and it remains an ongoing project that will evolve into a full-blown time and frequency standard.

If your taste in GPS clocks is far more simple, there are plenty of projects showing how a more basic one can be produced.

A Tetris Clock

$
0
0

We have had no shortage of clock projects over the years, and this one is entertaining because it spells the time out using Tetris-style blocks. The project looks good and is adaptable to different displays. The code is on GitHub and it relies on a Tetris library that has been updated to handle different displays and even ASCII text.

[Brian] wanted to use an ESP8266 development board for the clock, but the library has a bug that prevents it from working, so he used an ESP32 board instead. The board, a TinyPICO, has a breakout board that works well with the display.

There are also some 3D printed widgets for legs. If we’re honest, we’d say the project looks cool but the technology isn’t revolutionary. What we did find interesting though is that this is a good example of how open source builds on itself.

Of course, the library does a lot of the work, but according to [Brian] the it has several authors. [Tobias Bloom] started the code, and others have changed the library to draw ASCII characters and to support any display that uses the AdaFruit GFX-style library.

So while the code is simple, the result is impressive and is a result of [Brian] leveraging a lot of code from others — a great example of Open Source in action.

We looked at Brian’s use of this library for a YouTube subscription counter, but a clock has more universal appeal, we think — not everyone has a lot of YouTube subscribers. If you don’t have a life, you might try to recreate Tetris using the game of life.

Making A Digital Clock A Little More Intuitive

$
0
0

Digital clocks are extremely useful and generally considered pretty easy to read. However, they can sometimes have rather arcane interfaces for setting the time and alarms. For [Michael Wessel], he noted that in the 1980s he had to routinely help his grandparents set their clocks for this very reason. That inspired his most recent project – a digital clock that’s intuitive to use.

Many digital clocks work in the same way, in which a digit of the time is set, before another button is pressed to cycle to the next digit. This can get confusing, so [Michael] went a different way. Instead, each digit can be cycled through using its own button, which can make things easier. It’s not readily apparent how one chooses to set the time, date, or alarm, but it’s an interesting take on how to create such an interface.

The clock relies on an Arduino Mega to run the show, with an RTC for timekeeping and a temperature sensor to boot. There’s also a sound sensor, which allows the alarms to be shut off with the clap of a hand or by shouting “STOP” at the alarm. Overall, it’s a tidy build with that hacker-favourite seven-segment aesthetic. Of course, you can take that very concept to its extremes, too. Video after the break.

An ESP8266 Clock With Built-In Notifications

$
0
0

When we recently discussed the skills that we might wish to impart upon a youngster, one of those discussed was the ability to speak more than one language. If any demonstration were required as to why that might be the case, it comes today in [Byfeel]’s Notif’Heure, an ESP8266-powered clock and display (French-language, Google Translate link). If we only watch for English-language projects, we miss much of the picture.

The project began life in April 2018 (Google Translate link) and has since speedily progressed through many software versions to the current v3.2. In hardware terms it’s pretty simple: an ESP8266 development board drives a set of LED matrix displays. In the software though it has the primary function of an NTP-synchronised clock, there is also support for notification display and integration with the Jeedom home automation package.

We’ve featured innumerable ESP8266 clocks over the years, but surprisingly this is the first one with Jeedom integration. With so many to choose from it’s difficult to pick examples to show you, so perhaps it’s time to go to the truly ridiculous with this twelve-ESP monster.

Merci beaucoup au [Erwin] pour le tip!

Split Flap Clock Keeps Time Thanks to Custom Frequency Converter

$
0
0

Why would anyone put as much effort into resurrecting a 1970s split-flap clock as [mitxela] did when he built this custom PLL frequency converter? We’re not sure, but we do like the results.

The clock is a recreation of the prop from the classic 1993 film, Groundhog Day, rigged to play nothing but “I Got You Babe” using the usual sound boards and such. But the interesting part was getting the clock mechanism keeping decent time. Sourced from the US, the clock wanted 120 VAC at 60 Hz rather than the 240 VAC, 50 Hz UK standard. The voltage difference could be easily handled, but the frequency mismatch left the clock running unacceptably slow.

That’s when [mitxela] went all in and designed a custom circuit to convert the 50 Hz mains to 60 Hz. What’s more, he decided to lock his synthesized waveform to the supply current, to take advantage of the long-term frequency control power producers are known for. The write-up goes into great detail about the design of the phase-locked loop (PLL), which uses an ATtiny85 to monitor the rising edge of the mains supply and generate the PWM signal that results in six cycles out for every five cycles in. The result is that the clock keeps decent time now, and he learned a little something too.

If the name [mitxela] seems familiar, it’s probably because we’ve featured many of his awesome builds before. From ludicrous-scale soldering to a thermal printer Polaroid to a Morse-to-USB keyboard, he’s always got something cool going on.

Viewing all 493 articles
Browse latest View live


<script src="https://jsc.adskeeper.com/r/s/rssing.com.1596347.js" async> </script>